Same Like the Problem Steps Recorder tool, DxDiag is another inbuilt Windows tool which is not familiar among the majority of the Windows users Community. Infact, this is the only all-in-one tool for any person, seeking the complete system information. While troubleshooting anything, there is always the need to check any particular system information. Why to wonder here and there, when we have this great inbuilt utility to grab all the information related to our system within seconds and under the same roof. In DxDiag, “Dx” stands for DirectX and “Diag” stands for Diagnostic, don’t get confused with its full form, it will show you each and every system’s information, you are looking for OR in need to capture.
Many of you maybe wondering about this DirectX, Please check the complete definition of DirectX at Microsoft Website. Actually DxDiag is designed to diagnose DirectX problems, but we have discovered it as a tool, to find complete system details. This system utility also gives us the option to save the complete report in TXT format, for any of the future reference. It can show you any system related information, which will take ages to find them using control panel option. In simple words, in case of any system related information just open DxDiag and that’s it, the information is on the screen. Today, we will guide you, about using this great DxDiag tool and explain its features in detail. Let’s move to the main section now, How to use DxDiag.
How to open DxDiag, Complete Easy STEPS.
1)- Go to the Start Menu and search for “DxDiag” in the search box there.
2)- Once you find the DxDiag tool in the search results, Open it. (If you are not logged in as Administrator, it will ask you to provide Administrator’s Credentials).
Note: You can also open DxDiag, by typing “DxDiag.exe” in Window’s RUN command.
3)- Now you are with the DirectX Diagnostic Tool. Here, you can check any System related Information about the machine.

As you can see on the screen, The DxDiag Window consist of 4 Tabs, System, Display, Sound and Input. This is actually good that the system information has been divided into sections, as it just makes easy for us to look for any particular information. Now the main one, Why to use DxDiag, when we are habitual to grab the system’s information using the old traditional methods ?. Let we ask you one thing, do you know the model number of the system you are using ?, you may find it using old methods, but in how many minutes ? 🙂 . Forget all traditional methods you have used in the past, just remember DxDiag, Do you find anything missing from here ?. In addition to this, it also have a notes section in the bottom, where it list the problem that exists in the system. Don’t you think this is an amazing tool to have in our basket. Let’s have a look on some of its main features, because then only you can decide, to use it or not.
Important Features of the DxDiag tool.
1)- System.
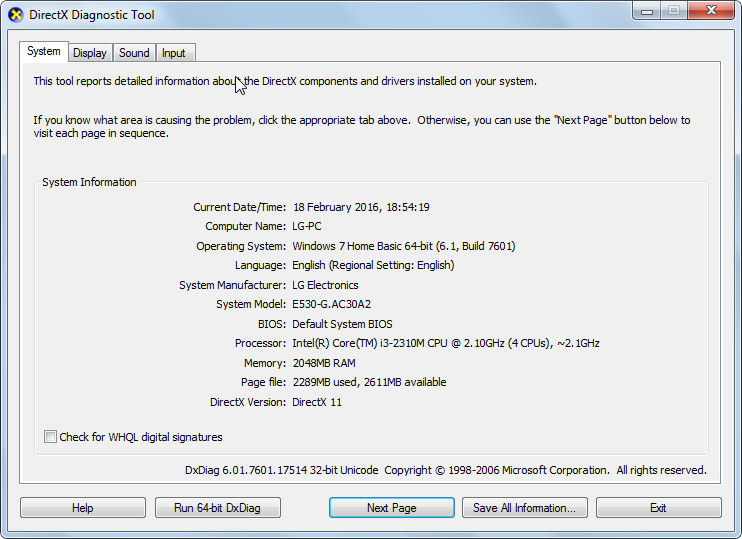
This is the TAB from where you can extract the information related to, used operating system, language, computer name, system manufacturer name, system model 🙂 , processor type, total RAM, DirectX version, total virtual memory and used virtual memory. These all are the basic information related to your system, which is useful while installing any heavy softwares or games, to check their compatibility. Here, “Check for WHQL digital signatures” refers to check the installed drivers for the digital signatures.
2)- Display.
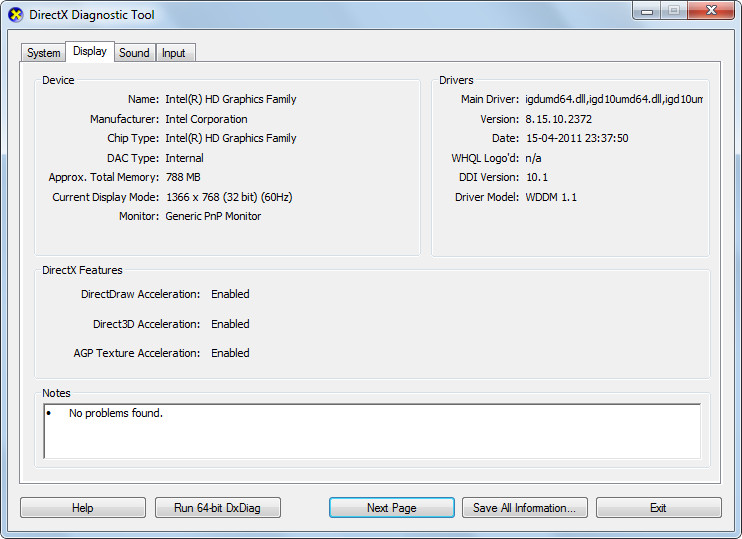
In this TAB, you can collect information related to the display drivers, display mode, enabled or disabled DirectX features. Don’t panic if you find any DirectX feature disabled there, it may be not supported by the display hardware of your system, or check other sources for any perfect solution to enable it. You always have to remember, graphic acceleration is the most important factor for the best performance of the system. We have written this issue to our To-Do list, and will discuss the same, some other time.
3)- Sound.
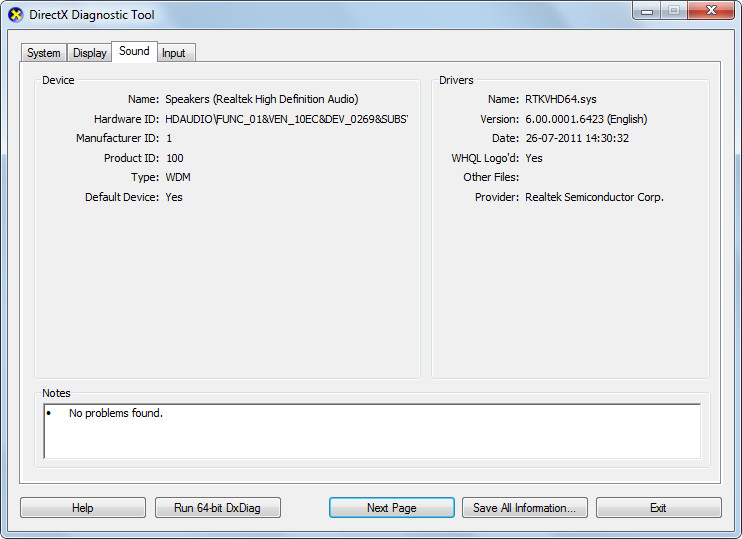
This tab belongs to the multimedia. Here, you will find all the information related to the Sound device and drivers. In case of Audio failure in the system, you can check this TAB to gather the information related to the audio driver and can arrange the same from the web or dealer. You can also check the NOTES section at the bottom, to check any conflicts between the drivers.
4)- Input.
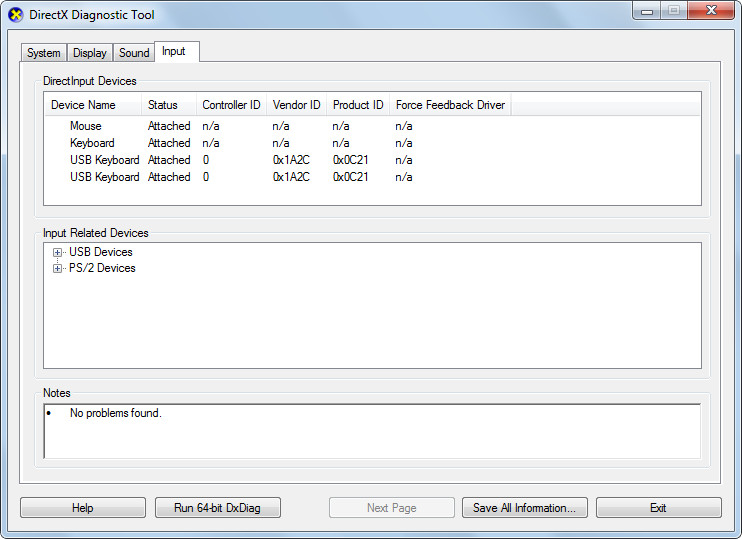
The last but not the least, In the Input TAB, You can check all the existing input devices attached to the system. You can use this TAB to figure out any conflicts within the devices or drivers. Have you ever faced any problem with your pen drive ?, like plugged in but now showing up anywhere. Using this DxDiag tool, you can easily check whether the system has recognized it or not. Just open this tool, plug in your pen drive and check if it’s showing there in the Direct Input Devices section. Don’t you think it’s helpful.
Saving Current System Information for any future use.

The option “Save All Information” is to save the current system status / information to a text file, for any future reference. This will help in the case, when you are in the process to change or update any device driver of the system. While updating any driver, if anything goes wrong, you can easily collect the previous driver details from here and revert it back. This saved information about the system is also helpful while troubleshooting different problems. To save the information, just click the Save Information button, supply any desired file name and save it to any safe place. That’s it, you are now safe for any future conflicts.
Run 64-bit DxDiag.
By default, DxDiag always run in 32 bit mode. By using this option, you can run DxDiag in 64 bit mode. (64-bit Windows is necessary to run DxDiag in 64-bit mode).
Final Words.
So today, you have learned to grab all the system information of your machine using a brand new method. Please share this method to all your friends, remember sharing is caring. If anybody has any doubt related to DxDiag, don’t hesitate to ask the same under the comments section of this blog, we will be happy to answer them. That’s it for now, ending this now, with a promise to be back with many more important discussions. Bye Bye, Please take good care of yourself as this blog is just and just for you.
Thanks for visiting, God Bless Everybody on this planet, keep visiting a2z infomatics.

